Monday, October 29, 2012

Candied Hexagon Quilt Progress

I thought I had already blogged about this but alas, no it was just a throw away line on a post a year ago.

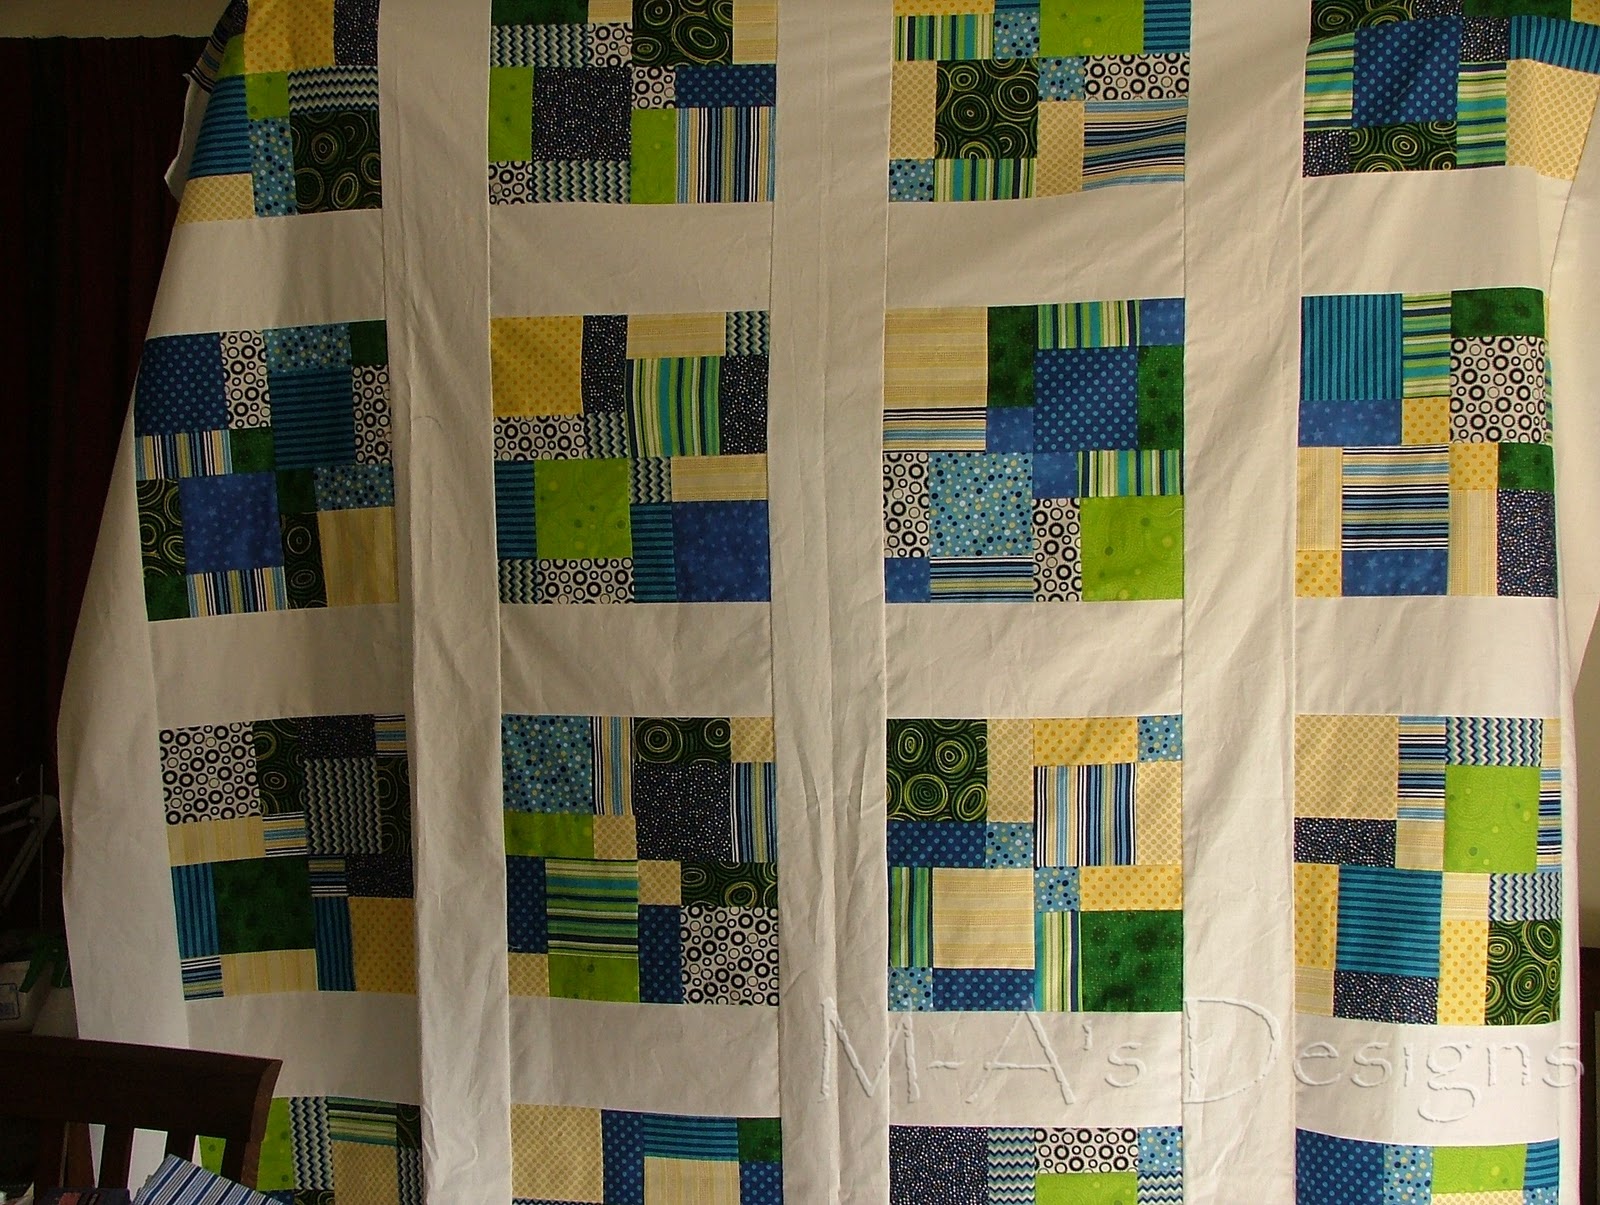
I've been slowly working on a Candied Hexagon Quilt, like that from the cover of Australian Quilters Companion Vol 5.2 Issue 18 (2005) by Kerry Dear. It's my go-to project to take to Sit and Sew Evenings with the MMQG. Of course, I don't have a pattern to follow as it's been out of print for years and typical me, I don't like following patterns anyway. The original had around 5 hexie designs, including a solid hexie using a feature fabric but I don't want to use a feature fabric and since it's for Little Lady I wanted to focus more on colour rather than patterns so am using mainly blenders in her favourite 4 colours mixed with randomly patterned bits. So I got all creative and with the help of some hexie drafting paper, doodled until I had around 30 hexie designs, ranging from simple to holy-crap-thats-going-to-be-a-nightmare-to-piece. I've worked out that I need 297 full hexies with 6cm sides (~2 1/3 inches) and 18 half hexies to fill a double bed quilt with a simple outer border. To date I have 65 hexies sewn, starting with some of the simpler designs.

Hex1 hexies
 
Hex2 hexies - these use same pattern but by changing how I oriented the triangles, I wound up with 2 different looking hexie patterns that appear to twist in both directions. Bonus!

Hex3 hexies

Hex5 hexies - again simply by playing with the colours I've turned one pattern into 3 different hexies.
 
Hex8 hexies


Thursday, October 25, 2012

Randon Quilt Back

Another WIP, the summer quilts I started back in January for my two monkey got put aside once the weather turned cold and I've recently dug them up again. I've been slowly working on Little Lady's quilt back and its now finished. I had no plans when I began randomly cutting rectangles and squares for the back - I didn't measure anything, just auditioned fabric, keeping in mind that I didn't want the same colour next to itself, and cut it to fit the gap I wanted to fill. Organised random I guess you could say. It started somewhere in the middle and grew from there.

Wednesday, October 17, 2012

Hexie Windows Update

I haven't worked on this in such a long time but it's been staring at me recently, taunting me to stop procrastinating and just get on with it.


I finished piecing it months ago and am now very slowly filling in the windows. Probably not the most visible colour window to show where I'm currently at but it was the first fabric I chose.

 
My first window was a bit lop-sided but I think it won't been noticable once all the other windows are in. Note to self for next time: make the hexies bigger - the windows wouldn't look so anemic then!

Sunday, August 12, 2012

Catch up

Been ages, hasn't it? I haven't done as much sewing as I'd like but it's been that kind of year. I have many projects 'in progress' including painting Little Lady's toybox with only the final coat of gloss to go on the lid (don't even ask how long it has taken to get that far), making pyjamas and embroidered easter egg bags for both my monkeys, the summer quilts which still need backs (hopefully they'll be finished by next summer), the candied hexagon quilt which I chip away at each time I go to a Sit and Sew Evening for the Melbourne Modern Quilt Guild, my hexagon cathedral window pillow cover (really need to finish this one off), and the crocheted rug which I think still needs a final border.

The only things I've managed to finish are things that were for other people. I've been doing a bit of volunteer sewing work for Little Lady's Kindergarten including designing and completing 6 custom fit double-sided sound deadening table covers for use at the Kinder, and also donating a number of small embroidered easter egg bags that I made specifically for the Easter fundraiser which helped pay for a duck hatching program at the Kinder which all the kids just loved. I've also made a few more easy-release craft aprons for a client similar to this, and my favourite is a wonderful baby quilt and matching block by request from my dear friend, Leah, which I just have to show here.


The front featured a puppy dog, robot and tow truck with trapunto detail and a hand embroidered Name & Birthdate panel.


The robot may be familiar to some as its from Kellie Wulfsohn of Don't Look Now's "Robot Riot" quilt.


I wanted the back to also have some detail and loved the "Modern Pickle Relish" design by Modern Quilt Relish which I adjusted slightly to suit a square quilt shape.


I quilted it with a medium density meandering loop pattern over the coloured sections using a blue variegated rayon thread, and used a tighter meandering loop and star pattern in the white border and white background areas of the applique shapes with a white rayon thread.


The block has lots of textured ribbon tabs around it's borders and I loved the idea of making it more interactive so included a dinosaur with a crinkly spiky spine and a felt kite with ribbon tail for bubs to play with.


It's projects like these that remind me how much I love quilting.

Sunday, February 26, 2012

Shelley Doll

Late last year, while flipping through the December issue of Australian Homespun (No. 103 Vol 12.12), Little Lady fell in love with the Shelley Doll designed by Mary-Anne Hogan. So we made her together over the next week or so, and by we I do mean both of us. Little Lady started by picking out all the fabrics, threads and buttons.


Here's headless Shelley. The above pic shows what the magazine Shelley looks like. Little Lady made a few adjustments as you'll see. She loved being so hands on. I actually remodelled Shelley's hands to include thumbs according to Little Lady's instructions - "mummy, she HAS to have proper hands!" and Little Lady sat on my lap at the sewing machine while sewing Shelley's body parts and helped by taking out pins and pressing buttons on my machine. 


Head in place and add a little lippy... I used Jo Sonja's Matte Fluid Acrylics in Carbon Black for her eyes and nose, and Brown Madder for her lips - colours I had on hand from the Bunnies Project.
 

I cut up an old pair of my jeans for Shelleys pants. All the patches and embellishments were sewn on with embroidery floss and an obvious running stitch. My favourite part is the button and bead detail on the botton of Shelley's jeans.


Little Lady actually sewed all these on herself with me just directing where to stab the button or fabric whenever she wasn't sure.


Not bad for a 3 year old, eh? Yep, a 3 year old!! I'm a very proud mummy.


Pants on. Must protect Shelley's modesty.


The Hair. An indication of things to come when Little Lady gets older? The round buttons at the bottom of her shirt are made of shell.


Shelley's kerchief. I sewed everything this time. Little Lady told me her fingers needed a rest because "is she finished yet? It's taking FOREVER!!"


Her shoes were a real pain as I didn't want to use felt (didn't have any) and I wanted them to be completely washable so no cardboard inserts. I used some template plastic and sandwiched it between 2 pieces of purple homespun, using ladder stitch to sew the fabric pieces together while enclosing the plastic. I tucked the ends of the shoe strap in as I went making her shoes fit pretty snuggly so they won't fall off while she's being carried around.


Little Lady absolutely loves her. I thought I'd have to wait years to begin doing things like this with my baby girl but she surprised me with how patient and careful she was with her sewing. I can't wait for the next time she wants me to make something with her, not just for her.

Saturday, January 7, 2012

Summer Quilts

Little Lady is like me, she has to sleep under a doona regardless how hot it is at night. Unfortunately her eczema is flairing up again as a result of being too hot so I'm making a light weight quilt with cotton wadding which will hopefully be much cooler to sleep under. This is where I'm at after a week of cutting and sewing...


Little Lady chose all the fabrics. And since Little Sir is almost ready for a big boy bed, I'm making him one too.


I found the pattern here which was adapted from this Moda Bake Shop pattern and I've adapted it further to make it a double bed size quilt. It's very simple which is perfect as I need to finish these quickly and also the speed with which I'm putting these together is helping reignite my sewing passion. I'm planning on doing a very simple pieced backing with big pieces of plain coloured homespun.

And to show that I have actually finished it, here's some quick shots of Emma's quilt.
It's quilted all over with meandering loops and hearts. Still not sure how or when this will get to little Emma but at least it's finished now.


Wednesday, December 14, 2011

Medical bag and Tool bag

When I do a big tidy of the kids toys I tend to sort them, not that the kids play with any one category of toys at a time - I've been served tea with toy screwdriver parts in toy saucepans before. So it was more for my benefit than theirs, tho they love bags of any sort, when I made a Medical Bag and a Tool Bag to put all their medical and building tools in.

I used fabric from my stash and some left over Vliesofix and made a simple tote bag to which I had raw edge appliqued a red cross and a hammer onto. I even used a french seam on the bags because I couldn't be bothered zigzagging the edges and this way they can't fray. Only took about an hour to make both and as predicted they're used for carting around toy food and books, not medical instruments or hammers and spanners. But their eyes lit up when they first saw them and they ARE being used so I can't complain.


Tuesday, December 13, 2011

Oh yeah, that's what I was doing...

I'm a little stuck right now, unable to do anything without a little clingy shadow (Little Sir is sick) so what better time than now to update my scrapbook. I lost my sewing mojo again and I've been busy with other stuff but I have managed to still do some crafting since my last update. Finished projects include a couple of toy bags and a Banana's in Pajamas cake. My current in progress projects include the log cabin crocheted blanket, the hexagon cathedral window pillow (all hexies in place, just gotta start adding the coloured windows), Little Lady's Candied Hexagon Quilt (I blame this project for my current lack of motivation to sew - it's turned out to be way, way more work than I thought it'd be and is in NO WAY going to be finished anytime soon) and a Shelly doll from the current Australian Homespun (No. 103 Vol 12.12). I'm making Shelly with Little Lady - she has picked all the materials and helped me pin, cut and sew (by sitting on my knee at the machine, removing pins, pressing my up/down button and cutting threads). We've also stuffed her parts and now I'm "taking forreeevvveeeeerrrrr" to sew her together before we sew on her hair, make her clothes and decorate her. I've gotta take some pics and then will endeavour to post a bit more regularly. Maybe...

Saturday, August 27, 2011

Hexie Windows Shaping Up

It's slowly coming together. All my folded hexagons have been pressed and the centres secured and now I'm slowly sewing them together. I'm using ladder stitch as my preferred blind stitch.


To be continued...

Friday, August 19, 2011

Slight hitch

So I spent last night ironing folds and it turns out that I've misjudged how thick some of my seams are which means they won't fold back on themselves to overlap the colour window insert. Duped by the thinness of my paper template. But after playing with it some more this morning, if I snip this and tuck that it still might work. I'm determined to get this. After all I've already cut the fabric so really what have I got to lose by hacking it some more?

To be continued....

Thursday, August 18, 2011

New Project

My sewing mojo is back thanks to a couple of recent Sit and Sew sessions with the gals at the MMQG. In particular Rachel and Bek have got me thinking about catherdal windows and while I don't want to make a whole quilt, I'd love to make a few pillows to dress up my couch. I'm not sure if a sew-along will happen just yet but I couldn't wait so when Spotlight had a 30% off storewide sale earlier this week I went to stock up on base fabric. As usual they were out of white but there was a roll of unbleached quilters homespun that had a linen-like weave which was down to $4 a metre so I picked up 3.5m, enough for 3 pillows I hope. And I've got plenty of coloured bits for the windows in my stash.

But here's the catch. I don't want to do square catherdal windows. You see, the other project I want to do is make a light summer weight quilt for each of my little monkeys to sleep under this summer and at the moment I'm thinking one of them, probably Little Lady's, will be based on the Candied Hexagon quilt like the one on the cover of Australian Quilters Companion Vol 5.2 Issue 18 (2005) which was designed by Kerry Dear. By the way, this issue is out of print and I don't have a pattern but that's nothing new.

Anyway, with hexagons in mind I want to make a hexagon catherdal window pillow. I can't find a pattern online anywhere and it's taken me 2 days but I finally figured out how to fold the hexagons and now that I've got it I don't want to stop in case I forget so I've been busy making templates...


...and cutting today.


Now I'm up to ironing and folding my hexies. It's going to have to be all hand sewn because the sides don't unfold like a traditional square but I want to hand sew the windows in anyway so whats a little more hand sewing. Famous last words no doubt!

Tuesday, August 9, 2011

Feminist much?

I resisted, truly I did. At one point there was no way I'd buy a toy ironing board for my little girl, NO WAY! It's a job I loath and I hate the expectation that boys get tool sets and toy lawn mowers (cool stuff in my books since I love tinkering and gardening) and girls get ironing boards and cleaning trolleys (in my head complete with images of being chained to the laundry and toilet brush). It sets my teeth on edge just thinking about it. And before you jump down my throat, yes I know that you can buy all these toys for boys AND girls but as free thinking and equal as we are it is still implied and more often the norm that females do the vast majority of the washing and cleaning and cooking and other 'home duties' and such toys are targeted accordingly.

Then my sister got my nephew a toy iron which makes steam noises and a little ironing board and Little Lady and my niece just loved it and in all honesty it didn't seem so distasteful once I saw them play. I know, where were my high and mighty principles then? They were watching my baby have a ball playing with another toy which made cool noises, not learning a lesson in 'life roles'. Funny how so much continues to change after you have kids.

But being in a bit of a cash flow situation and still stubbornly adamant about NOT buying an ironing board, I did the next best thing.

I made one.

A quick search on Google found only this which is a vintage toy ironing board plan with some basic measurements for me to start with. Then I read the instructions that went with it...

"While your little girl happily joins mom in doing the family ironing..."

Ahem. Well... lets just say I would not have been popular in the 1950's. But the plans were simple and exactly what I was after... with a few adjustments from me of course.

It took me a couple of hours each day over 3 days with both kids sick and myself and Gorgeous Man sleep deprived as a result though it could easily be finished in a day if I hadn't painted it... or started it at 6pm, and easily in a lazy weekend.


Pink is apparently the flavour of the moment


And God love her she only wants to iron fabric. A future sewer/fabriholic in the making. Gotta love that!

Saturday, August 6, 2011

Stained Glass Quilt Backing

The MMQG had a Sit and Sew Evening recently at G.J's in Brunswick which I wrangled time away from the fam to attend. I've lost my sewing mojo recently and while I have ideas for new quilts I'd like to make, in my current frame of mind I thought an easy quick thing to sew would be a pieced backing for the pink and yellow freckled whimsy quilt which has become another UFO of late.


I had a particular fabric in mind


but didn't realise how much I would need and of course didn't have so instead I sketched out an idea that would use almost all of it with the pink and yellow fabrics from the front thrown in. And on paper it looked pretty simple.


Quickly as a side note, I haven't been to a Sit and Sew Day for a while and I'd forgotten how lovely it is to be with other wonderful, talented, sew-insane people. Sewing can be a pretty solitary hobby. My sewing habit looks like I've simply dipped my toe in while they are completely drenched in comparison and I love the inspiration it provides.


I didn't get it all sewn at the SASE as the centre took way longer than I thought to sew up with all the interlocking pieces (and I spent a lot of time chatting and laughing with Rach, Bek and Sally) so even though I didn't get home until after 11:30pm I was still buzzed to keep going and quickly sewed the rest.

Stained Glass Quilt

I think it'd make a great simple quilt front too so I'll definately be making more of these.

There's another Sit and Sew Day mid August so hopefully I'll have this basted by then so I can quilt it and maybe, just maybe it might be finished in time to give to little Emma before she graduates high school!

Thursday, August 4, 2011

Long Time Coming

My mum taught me to knit and crochet when I was a girl, something I will one day teach to my kids. I'm a decent knitter and thanks to the wonders of the internet I now know how to sew knitted garments together. But most of my knitting endeavors still get ripped out (my family love to tease me about how I'm unravelling it YET again) or left unfinished and stashed in the cupboard when I run out of knitting steam.

So recently while looking for something else, I stumbled on bags and bags of unfinished knitted projects which all got unravelled as I have no intention of finishing them and hopefully the yarn might have half a chance to unkink if it's stretched around in a ball. Can that happen or do I have to steam it or something to straighten the yarn again?

Anyway, I also found a bag with a whole bunch of crocheted log cabin squares which got stashed because I ran out of the wool having grossly underestimated how much I'd actually need since I wasn't following a pattern. Did I forget to mention that I started this project over 10 years ago? I'm not going to even bother trying to find wool to match now.

Little Lady is in a zone at the moment where all her dolls need naps and everyone and everything gets a blankie which not surprisingly seem to be in short supply here. And not wanting to unravel these squares I got online and found how to join the squares using a flat braid and have been happily sitting at night watching Gorgeous Man play Assassin's Creed II (that is when I haven't been hogging the Xbox myself to play it) and crocheting the squares together.

I still need to sew in all the ends and haven't decided what kind of border to put on it or even if I need a border as the flat braid leaves a small scalloped edge on the squares but it is a bit small for a lap blanket and I think a border would finish it properly. Guess I'll need more wool after all.

Wednesday, August 3, 2011

Pink Cardigan Finished

I've finally finished the pink cardigan that I started back here. I sewed it up and blocked it before crocheting the hems (row 1: 3 dc into every stitch, row 2: 2 dc into every stitch) to give a ruffle effect. On the 2nd row I incorporated pink and clear beads spaced out every three or four stitches. Then she wanted buttons so I crocheted small chains to attach large heart shaped buttons and also to make a matching loop. I deliberately made both long so that the cardigan would close so you could see both the ruffle and the buttons. She hasn't worn it yet and I'm really hoping it won't be too small. Overall though I'm really happy with how it turned out.


Tuesday, June 28, 2011

Our first commission

The third quilt I've been flat out making was a commissioned King Single Quilt for a gorgeous little 3 year old, Amelia. I'm slowly unveiling it over at 2 of 4 but here are some sneak peaks.


I learned so many new techniques putting this quilt together, including raw edge applique and trapunto which were inspired by the amazing work of Kelly Wulfsohn of Don't Look Now, and I've gotten so much better at controlling my free motion quilting.


This little guy is the big brother of the caterpillar I made for Little Sir's baby playgym mat and I've also made a pillowcase to match the quilt.

So far I don't have any immediate plans to begin anymore quilts (I can hear my husband sign with relief) as I'd really like to finish Little Lady's cardigan - I'm thinking of changing the edging to a ruffle rather than a picot/scallop. But right now I'm going to wrap my monkeys in beenies and coats and take advantage of the sun and head off to the park before the weather decides to turn crappy again.

Thursday, June 16, 2011

Quilting designs

I planned the quilting designs for the freckled whimsy quilts long before I got anywhere near quilting them. I used google images for inspiration and practiced sketching on paper first to work out how to draw them in one continuous line. Next I made templates in cardboard of the general shape and traced these onto the quilt top with the water erasable Clover pen, then basted the quilt.


On the purple and pink quilt I quilted a meandering pattern of swirls and hearts 

 and incorporated each design as I came to it, including a rose,
 
a tulip,
 
 a handbag,

 butterfly,

bumble bee,

and flower.

On the blue quilt I used a meandering pattern of loops, stars,

and occasional waves

to fill in the spaces between crabs,

octopus,

seahorses,

dolphins,

fish,

boats,

and anchors.

The finished quilts measure 1.2m x 1.5m.

For my gorgeous little niece

and my handsome little nephew.
Related Posts Plugin for WordPress, Blogger...